
適当にネットワークの設定を進めたところ、他の端末からはVirtualBoxのCentOSへSSH接続できるものの、VirtualBoxを入れたWindowsからSSH接続すると「Connection refused」になるという変な状態になってしまいました。
マヌケな事をしていただけなのですが、正しい手順となぜこうなったのかをメモしておきます。
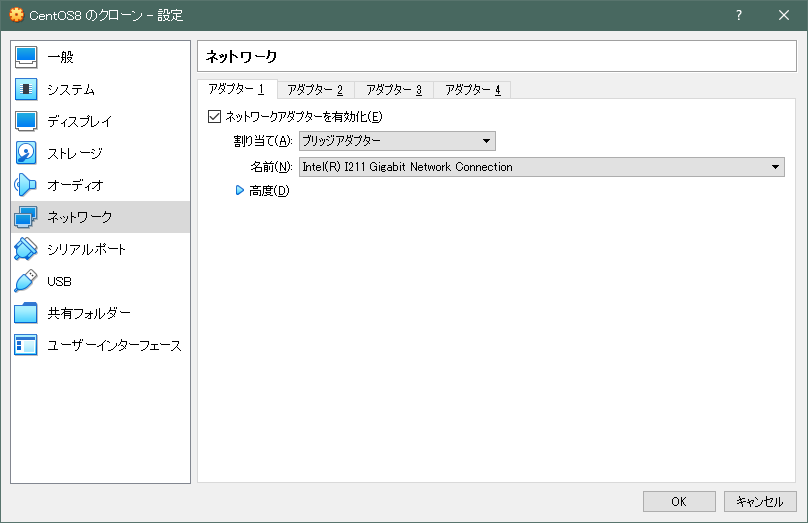
VirtualBoxのネットワーク設定
仮想マシンを右クリック > 設定 > ネットワーク
割り当ては「ブリッジ」にします。
「ブリッジ」はVirtualBoxのインストールされたPCのNICを経由し、CentOSが直接インターネットに接続されているような状態にするものです。
VirtualBoxでのネットワーク設定はこれだけです。
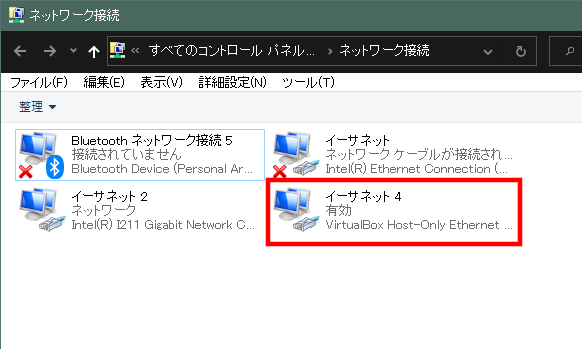
VirtualBoxをインストールすると、Windowsのネットワークアダプタの一覧に「VirtualBox Host-Only Ethernet Adapter」というのが追加されますが、「ブリッジ」の場合は使いませんので邪魔な場合は削除しても構いません(あとで追加できます)
削除する場合は「ファイル」から「ホストネットワークマネージャー」をクリックします。

以下から削除対象を選択し、「除去」ボタンを押すと削除されます。

再び追加したい場合は「作成」をクリックします。
初期設定されているIPアドレスは変わりますが、インストール直後と同じようにWindowsのネットワークアダプタの一覧に「VirtualBox Host-Only Ethernet Adapter」というのが追加されます。
CentOSでの設定
seLinux無効化
一時的な無効化をします
setenforce 0
ネットワーク設定
CentOS7からは「nmcli」コマンドで設定します。
以下の環境の例なのでIPアドレスやDNSは置き換えてください
- IPアドレス:192.168.2.217
- サブネットマスク:255.255.255.0(/24)
- gateway:192.168.2.1
- DNS:8.8.8.8 と 8.8.4.4
IPアドレスの設定
nmcli c mod enp0s3 ipv4.addresses 192.168.2.217/24
gatewayの設定
nmcli c mod enp0s3 ipv4.gateway 192.168.2.1
DNSの設定
nmcli c mod enp0s3 ipv4.dns 8.8.8.8,8.8.4.4
IPv4アドレス固定(DHCPを使わない)
nmcli c mod enp0s3 ipv4.method manual
起動時にネットワークを自動起動(ONBOOT=yes)
nmcli c mod enp0s3 connection.autoconnect yes
上記設定を反映させる
nmcli con up enp0s3
sshdの設定
/etc/ssh/sshd_config を開いて修正します。
rootログインの許可
PermitRootLogin yes
パスワード無しのログイン禁止
PermitEmptyPasswords no
パスワード方式のログイン許可
PasswordAuthentication yes
待受ポート指定
Port 22
sshd再起動
systemctl restart sshd
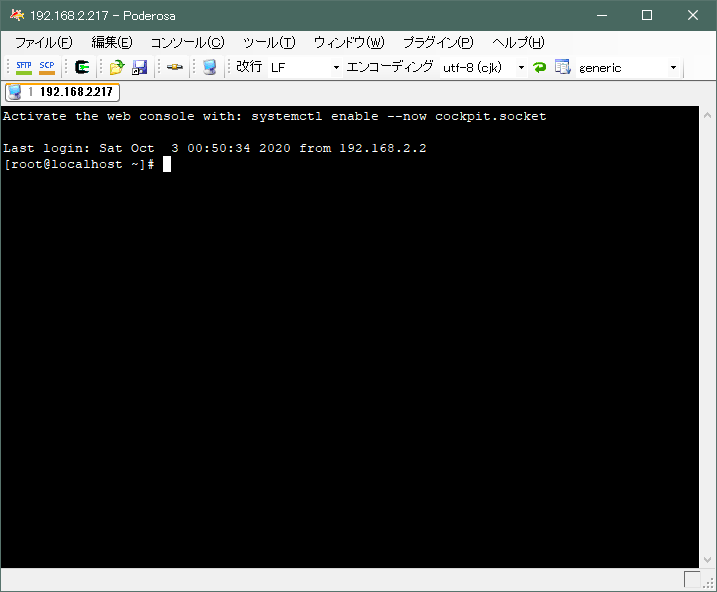
好みのSSHクライアントで接続してみる
接続できたら完了です。
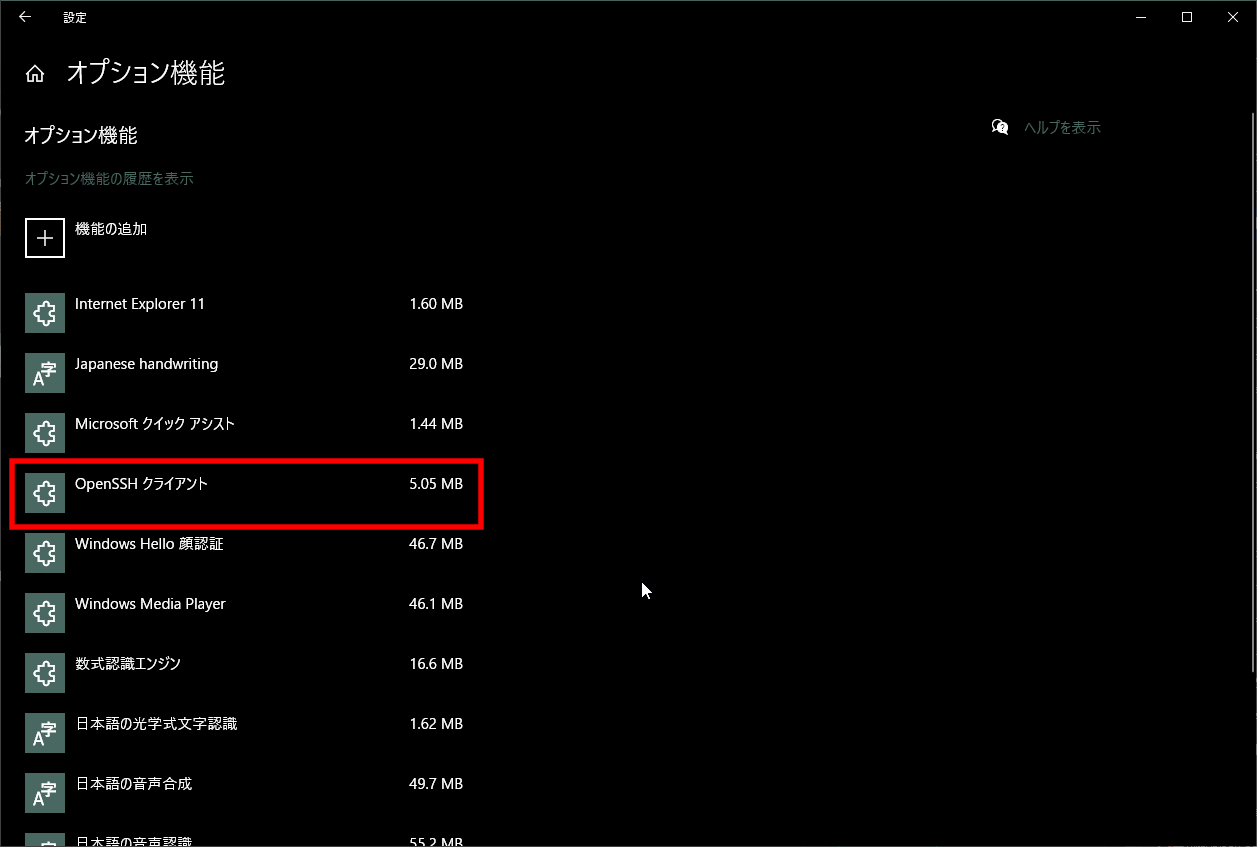
Windows10ではコマンドプロンプトからOpenSSHが使えるようになりました。
設定 > アプリと機能 > オプション機能
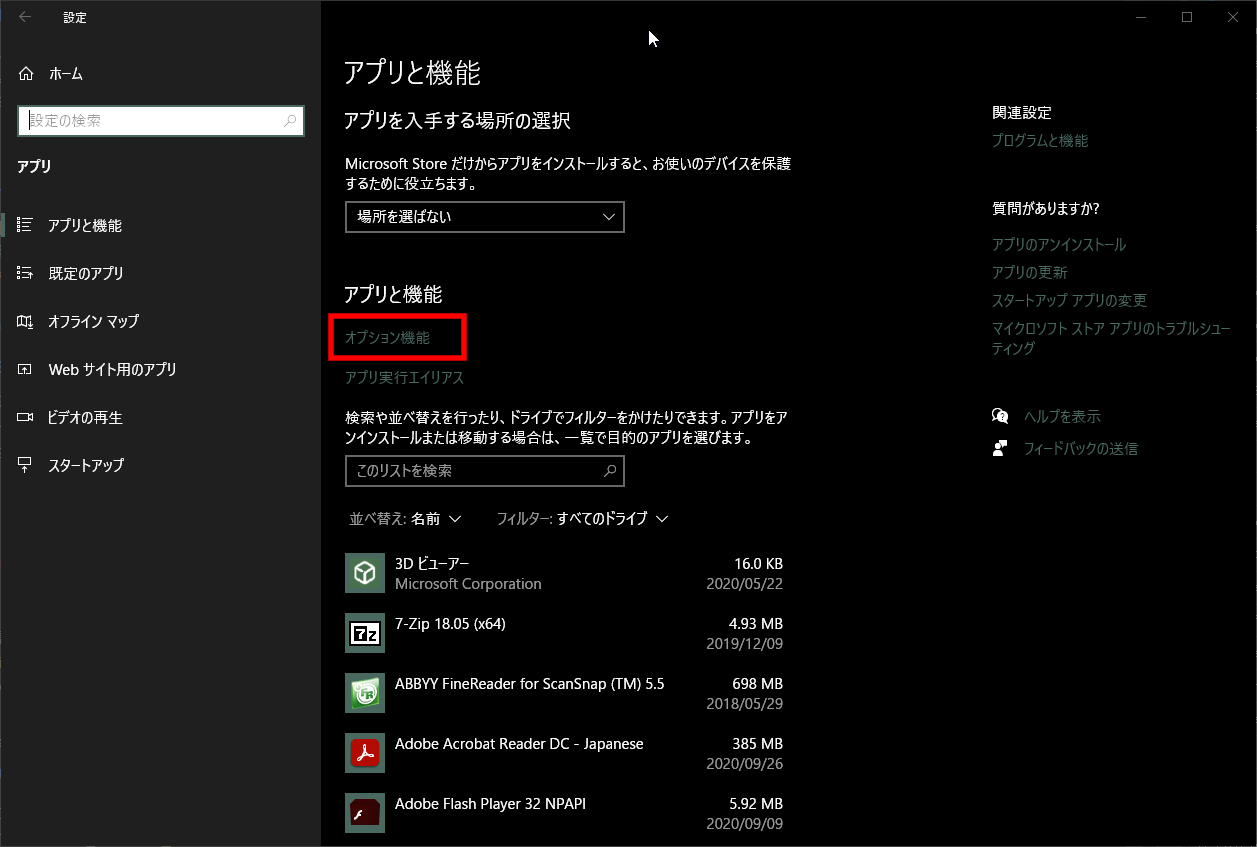
以下のように追加されています。
無い場合は、その上の「機能の追加」ボタンから追加できます。
ssh -v
C:\Users\Sakue>ssh -v
usage: ssh [-46AaCfGgKkMNnqsTtVvXxYy] [-B bind_interface]
[-b bind_address] [-c cipher_spec] [-D [bind_address:]port]
[-E log_file] [-e escape_char] [-F configfile] [-I pkcs11]
[-i identity_file] [-J [user@]host[:port]] [-L address]
[-l login_name] [-m mac_spec] [-O ctl_cmd] [-o option] [-p port]
[-Q query_option] [-R address] [-S ctl_path] [-W host:port]
[-w local_tun[:remote_tun]] destination [command]
以下のようにすれば接続できますが、
ssh root@192.168.2.217
C:\Users\Sakue>ssh root@192.168.2.217
root@192.168.2.217's password:
「-vv」というオプションを使うと詳細が表示されますので、うまく接続できない場合の確認に便利です。
ssh -vv root@192.168.2.217
C:\Users\Sakue>ssh -vv root@192.168.2.217
OpenSSH_for_Windows_7.7p1, LibreSSL 2.6.5
debug2: resolve_canonicalize: hostname 192.168.2.217 is address
debug2: ssh_connect_direct: needpriv 0
debug1: Connecting to 192.168.2.217 [192.168.2.217] port 22.
debug1: Connection established.
debug1: key_load_public: No such file or directory
debug1: identity file C:\\Users\\Sakue/.ssh/id_rsa type -1
debug1: key_load_public: No such file or directory
debug1: identity file C:\\Users\\Sakue/.ssh/id_rsa-cert type -1
debug1: key_load_public: No such file or directory
debug1: identity file C:\\Users\\Sakue/.ssh/id_dsa type -1
debug1: key_load_public: No such file or directory
debug1: identity file C:\\Users\\Sakue/.ssh/id_dsa-cert type -1
debug1: key_load_public: No such file or directory
debug1: identity file C:\\Users\\Sakue/.ssh/id_ecdsa type -1
debug1: key_load_public: No such file or directory
debug1: identity file C:\\Users\\Sakue/.ssh/id_ecdsa-cert type -1
debug1: key_load_public: No such file or directory
debug1: identity file C:\\Users\\Sakue/.ssh/id_ed25519 type -1
debug1: key_load_public: No such file or directory
debug1: identity file C:\\Users\\Sakue/.ssh/id_ed25519-cert type -1
debug1: key_load_public: No such file or directory
debug1: identity file C:\\Users\\Sakue/.ssh/id_xmss type -1
debug1: key_load_public: No such file or directory
debug1: identity file C:\\Users\\Sakue/.ssh/id_xmss-cert type -1
debug1: Local version string SSH-2.0-OpenSSH_for_Windows_7.7
debug1: Remote protocol version 2.0, remote software version OpenSSH_8.0
debug1: match: OpenSSH_8.0 pat OpenSSH* compat 0x04000000
debug2: fd 3 setting O_NONBLOCK
debug1: Authenticating to 192.168.2.217:22 as 'root'
debug1: SSH2_MSG_KEXINIT sent
debug1: SSH2_MSG_KEXINIT received
debug2: local client KEXINIT proposal
~~~~ 省略
今回のトラブルの原因
VirtualBoxはWindowsのネットワークアダプタの一覧に「VirtualBox Host-Only Ethernet Adapter」を追加しますが、ここにも今回のCentOSのIPである「192.168.2.217」を設定したからです。
両方に設定すれば同じネットワーク内に「192.168.2.217」というIPが2つ存在することになり、WindowsからCentOSに接続しようとしても、そのIPは自分に割り当てていますから、CentOSには行かず、自分自身にSSH接続しようとしていたという状態です。
無意識で設定してしまってたので、原因がわかるのにかなり時間がかかってしまい、最終的に「arp -a」をしたところで「192.168.2.217」が自分自身だと分かって解決しました。
手順通りやれば10分もかからないのに、まる1日悩みました・・・
おしまい。

コメントフォーム